If you're working on multiple machines or want to turn your PC into a development server that can be accessed from your MacBook (or any other device), Remote SSH in Visual Studio Code is a perfect solution.
Why Use Remote SSH?
- Work on code located on a remote machine directly from VS Code
- No need to sync files manually
- Access Linux or Windows development environments from anywhere
Prerequisites
- Visual Studio Code installed
- Remote machine (PC/server) with SSH enabled
- SSH access (user & password or SSH key)
Step 1: Install the Remote - SSH Extension
Open VS Code and go to the Extensions panel (or press Cmd + Shift + X on Mac / Ctrl + Shift + X on Windows).
Search for Remote - SSH and click Install.
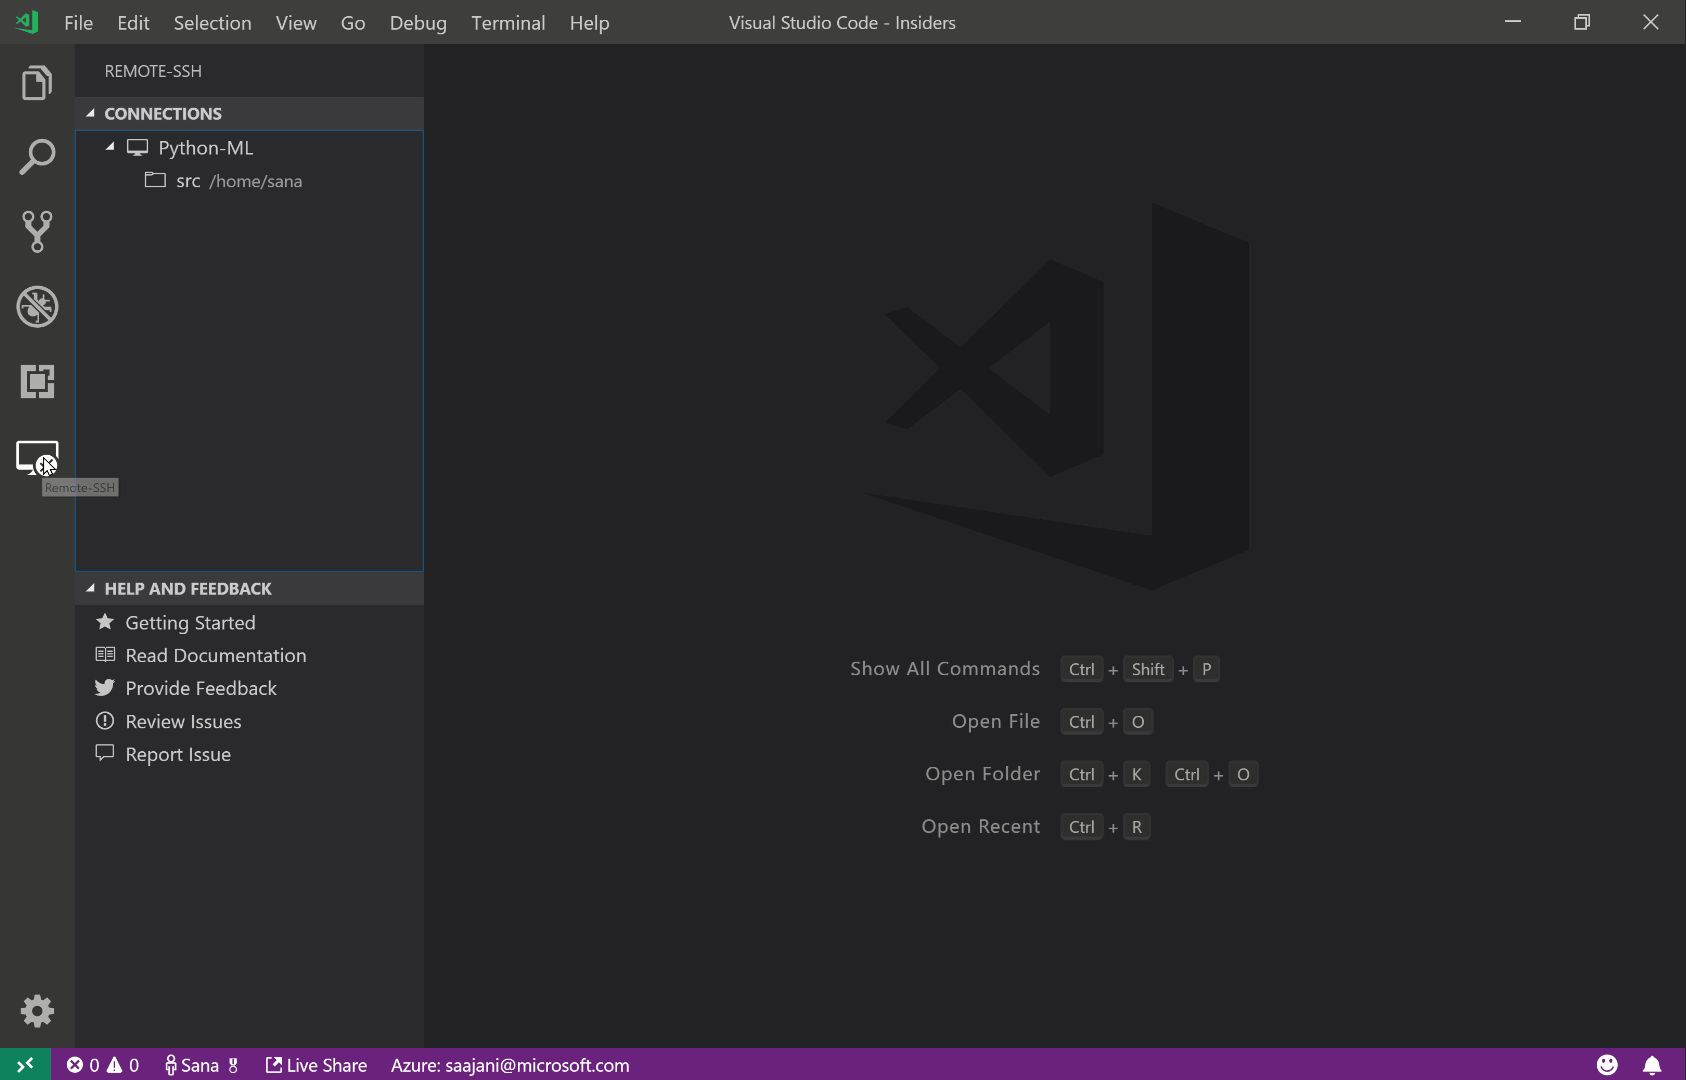
Step 2: Add a New SSH Target
Once installed, press F1 (or Cmd + Shift + P) and type Remote-SSH: Connect to Host..., then select + Add New SSH Host...
Enter your remote SSH address. Example:
ssh your-user@your-remote-ip-or-hostnameChoose the SSH config file path (usually ~/.ssh/config), and it will save the connection.
Step 3: Connect to the Remote Server
After adding the host, press F1 again and choose Remote-SSH: Connect to Host, then select your target.
VS Code will open a new window, connect to the remote server, and start installing the VS Code Server if needed.
Step 4: Open Your Project
Now you can open a folder on the remote machine just like a local project. Go to File > Open Folder and browse your server's filesystem.
Optional: Configure SSH Key Authentication
For better security and convenience, you can set up SSH key authentication instead of using passwords:
- Generate SSH key:
ssh-keygen -t rsa -b 4096 - Copy the key:
ssh-copy-id your-user@your-remote-ip
Done!
You're now working directly on your remote machine, with full access to terminals, extensions, and version control, just like on your local machine.
Tip: If you're using Tailscale, you can also connect to your development PC from anywhere using the Tailscale hostname!